If your daily walk feels more like a tug-of-war than a relaxing stroll, you are not alone. Teaching a dog to heel is one of the most practical skills you can build, and it transforms walks from frustrating to enjoyable. The heel command means your dog walks calmly at your side, with their shoulder aligned with your leg, on a loose leash. It is not about dominance or force, it is about clear communication and rewarding the right position. Whether you have a bouncy puppy or a strong adult dog, you can teach this with patience and the right approach.
Why the Heel Position Matters for Real Walks
The heel position is not just for show. When your dog walks beside you, they are safer because they are not darting into traffic or tangling with other dogs. It also makes walks more pleasant for you, no more yanked shoulders or tripping over a leash. For larger breeds, like the Cane Corso, teaching a solid heel is especially important because their size and strength can make pulling a real safety concern. The same goes for energetic herding dogs like the Australian Shepherd, who thrive on having a job to do. A reliable heel gives them a clear job during walks, which helps channel their energy in a positive way.
Step 1: Set Up for Success with the Right Tools
Before you start, gather a few basics. You will need high-value treats, something soft and smelly that your dog rarely gets, like tiny pieces of chicken or cheese. A standard flat collar or a front-clip harness works well for most dogs. Avoid retractable leashes for this training, a standard 4 to 6 foot leash gives you better control. If your dog is a strong puller, consider a harness that reduces neck strain, and if you have a large breed, you might look into options to reduce neck strain with proper gear. Start training in a quiet, low-distraction area like your living room or backyard. The fewer distractions, the faster your dog will learn.
Step 2: Lure and Reward the Position
Hold a treat in your hand at your dog’s nose level, right at your left side (or right side, whichever you prefer, just be consistent). Say your dog’s name and the cue “heel” in a cheerful voice. Then, take one step forward. As your dog follows the treat to stay beside your leg, mark the moment with a click or a word like “yes” and give them the treat. Keep your steps short at first, just two or three steps, then reward. The goal is for your dog to figure out that staying near your leg earns them a treat. If your dog forges ahead, simply stop moving, wait for them to look back or return to your side, then reward and try again. Do not yank the leash, just become a statue until they re-engage.
The word “heel” comes from the old command for a dog to walk at your heel, but modern trainers often use it as a position cue. Some dogs learn faster if you use a hand signal, like tapping your thigh, alongside the verbal cue.
Step 3: Add Duration and Direction Changes
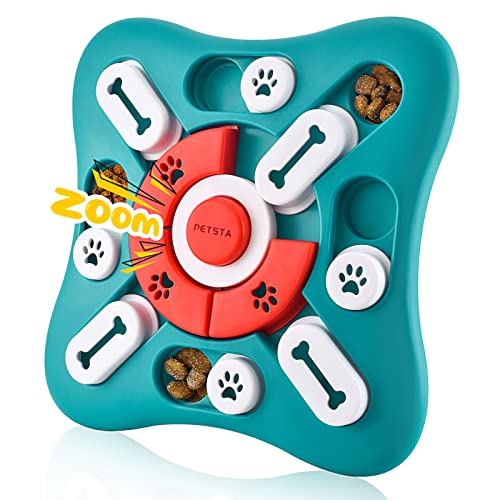
Once your dog understands the basic idea, start increasing the number of steps between rewards. Try five steps, then ten, then a full lap around the room. Mix in turns, both left and right, and even a few circles. When you turn, keep the treat low and lure your dog around with you. If they lose position, just stop and reset. Praise them warmly when they stick with you. For smart, active breeds like the Australian Shepherd, mental engagement is key. You can use a puzzle toy after a training session to reward their focus. This helps them learn that heeling is a thinking game, not just a boring walk.
Step 4: Proof the Heel in Real-World Distractions
Now it is time to take your training outside. Start in your driveway or a quiet sidewalk. The moment your dog sees a squirrel or another dog, they may break position. That is normal. When they do, simply stop and wait. Do not repeat the cue. Let them realize that pulling or lunging means the walk pauses. Once they look back at you or step back to your side, reward and move forward. Gradually work up to busier areas like a park or a street with light traffic. If your dog is food-motivated, keep a few high-value treats handy. For dogs that are very distracted, you might need to go back to shorter sessions and build back up. Remember, every walk is a training opportunity.
“A loose leash is a happy leash. When your dog walks beside you, you are both moving together as a team, not fighting against each other.”
Step 5: Troubleshooting Common Heeling Problems
If your dog keeps forging ahead, you may be walking too fast or rewarding too slowly. Slow your pace and reward more frequently. If your dog lags behind, use a happy voice and a treat to lure them forward. Never drag them. For dogs that get overexcited, try a short play session before training to burn off some energy. Also, check that your equipment fits comfortably. A collar that is too tight or a harness that rubs can cause your dog to pull or avoid the position. If you are using treats, make sure they are part of your dog’s daily calorie allowance. For puppies, consider a high-quality puppy food that supports their growth and keeps them motivated during training sessions.
Step 6: When to Use the Heel vs. a Loose Leash Walk
It is important to know that heel is a formal position, not the only way to walk. You do not need your dog in a perfect heel for the entire walk. Use it when crossing streets, passing other dogs, or in crowded areas. For the rest of the walk, allow your dog to sniff and explore on a loose leash, as long as they are not pulling. This balance keeps walks enjoyable for both of you. If you have a breed that is prone to gulping food, like some Australian Shepherds, you might want to use a slow feed dog bowl at mealtime to encourage calm eating, which can carry over into calmer behavior on walks. Consistency across all parts of your dog’s day reinforces the training.
Teaching a dog to heel takes time, but the payoff is a dog that walks politely beside you, ready to follow your lead. Keep sessions short, five to ten minutes, and end on a positive note. With practice, your dog will learn that staying close to you is the best place to be.