So you’re thinking about diving into the saltwater side of the hobby. That’s exciting! A saltwater aquarium is like bringing a piece of the ocean into your living room, with colorful fish, swaying corals, and fascinating invertebrates. But let’s be honest, the thought of mixing salt, managing water chemistry, and keeping everything alive can feel a bit intimidating. I remember my first saltwater tank, I was so nervous I’d mess it up. The good news? With the right plan and a little patience, you can absolutely do this. Let’s walk through the whole process together, step by step, so you can set up a thriving saltwater aquarium without the guesswork.
1. Choose the Right Tank Size and Location
First things first, bigger is actually easier when it comes to saltwater. A larger volume of water is more stable because changes in temperature and chemistry happen more slowly. If you’re a beginner, I’d recommend starting with at least a 40 gallon tank, but a 20 gallon can work if you’re short on space. Just know that smaller tanks require more frequent water changes and closer monitoring. Place your tank on a sturdy, level stand that can support the weight. A full saltwater tank weighs about 10 pounds per gallon, so a 40 gallon setup is around 400 pounds. Avoid placing it near windows, heating vents, or air conditioners, as temperature swings stress fish and corals. Also, make sure the floor can handle the weight, especially if you’re on a second story.
2. Gather Essential Equipment
Before you add any water, you’ll need the right gear. Here’s a checklist of what you’ll need:
- Aquarium tank and stand (glass or acrylic, your choice)
- Canopy or lid to reduce evaporation and keep jumpers in
- Protein skimmer to remove organic waste before it breaks down into harmful nitrates
- Powerheads or wavemakers for water movement, essential for corals and fish health
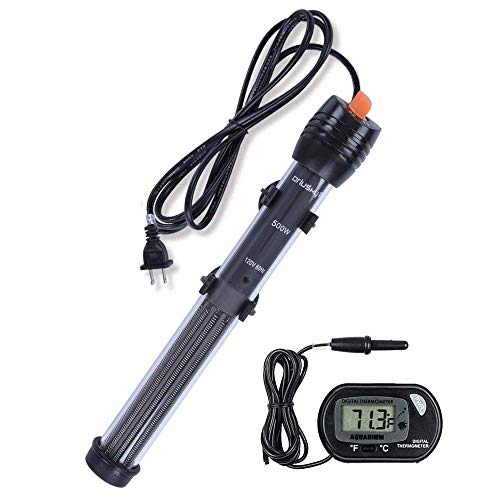
- Heater with a thermostat to keep water between 76 and 82°F
- Thermometer to monitor temperature accurately
- Test kits for ammonia, nitrite, nitrate, pH, alkalinity, calcium, and magnesium
- Salt mix and hydrometer or refractometer to measure salinity
- Live rock and sand for biological filtration and natural aesthetics
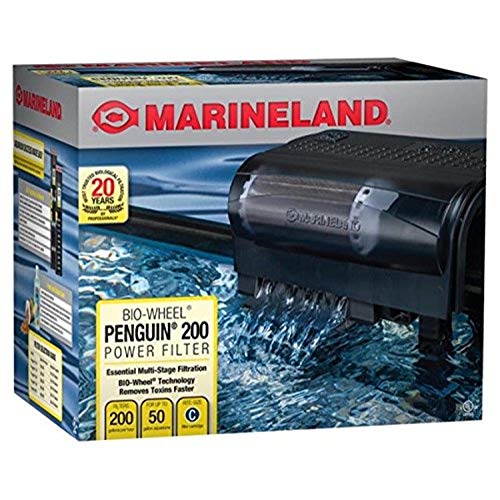
- Filter system, like a hang-on-back or sump, for mechanical and chemical filtration
When it comes to heaters, you want reliability. Check out our top 5 aquarium heaters to find one that keeps your temperature steady. And for water movement, a good wavemaker is key. I also recommend a digital thermometer, because the stick-on glass ones are often inaccurate. Our guide to aquarium digital thermometers can help you pick a reliable one.
3. Set Up the Tank: Substrate, Rock, and Water
Now the fun part, putting it together. Start by rinsing your sand thoroughly. If you use live sand, you can skip the rinse, but dry sand needs a good wash to remove dust. Add a layer of sand about 1 to 2 inches deep. Then, arrange your live rock. Live rock is the backbone of biological filtration because it hosts beneficial bacteria that break down fish waste. Create caves and overhangs for fish to hide, but leave space for water to flow. After that, mix your saltwater in a separate bucket using a powerhead to dissolve the salt completely. Aim for a salinity of 1.025 specific gravity. Fill the tank slowly to avoid disturbing the sand, then turn on your heater, powerheads, and filter. Let everything run for a day to ensure no leaks and that the water is clear.
4. Cycle the Tank: Patience Pays Off
This is the most important step, and it’s where many beginners get impatient. Cycling is the process of establishing beneficial bacteria that convert toxic ammonia into less harmful nitrates. You can add a few hardy fish, but the best way is to use a pure ammonia source or a piece of raw shrimp. Let the ammonia spike, then watch as nitrite appears, then nitrate. This process takes 4 to 8 weeks. Test your water every few days. Once ammonia and nitrite read zero and you have some nitrate, your tank is cycled. Don’t rush this, adding fish too early is the number one cause of death in new saltwater tanks. During this time, you can also add a nitrate remover to help keep nitrates low later on, but for now, just let the cycle happen.
5. Add Fish and Invertebrates Slowly
After your tank is cycled, you can start adding livestock, but do it gradually. Start with one or two hardy fish, like clownfish or damsels. Quarantine new fish in a separate tank for 2 weeks to avoid introducing diseases. Acclimate them to your tank by floating the bag for 15 minutes, then slowly drip tank water into the bag over an hour. This helps them adjust to the salinity and temperature. Wait at least a week between additions to let your biological filter catch up. Also, be mindful of your tank’s capacity. A good rule is one inch of fish per 5 gallons, but that varies by species. Overstocking leads to stress and poor water quality. If you plan to keep corals, you’ll need better lighting and more stable water parameters, so research your specific coral species.
6. Maintain Water Quality and Regular Care
Once your tank is established, the real work begins, but it’s manageable. Test your water weekly for ammonia, nitrite, nitrate, pH, and alkalinity. Keep nitrates below 20 ppm for fish-only tanks, and below 10 ppm for corals. Do a 10% to 15% water change every two weeks, or 20% monthly, depending on your bioload. Clean your protein skimmer cup regularly. Also, check your heater and thermometer daily to ensure they’re working. A reliable digital thermometer is a lifesaver, and our digital thermometer guide can help you find one you can trust. For larger tanks, an automatic water changer can make water changes a breeze, check out our best aquarium automatic water changers if you want to save time. And if you’re dealing with algae blooms, a UV sterilizer can help clear the water, see our UV sterilizer recommendations.
Did you know that a refugium, a small planted area in your sump, can help naturally control nitrates and provide a safe haven for copepods? It’s like a mini ecosystem that boosts your tank’s health.
“The ocean is a patient teacher, and so is a saltwater tank. Take it slow, and you’ll be rewarded.”
7. Troubleshooting Common Issues
Even with the best care, problems can arise. If you see a spike in ammonia, stop feeding and do a water change. If your fish are gasping at the surface, check your water movement and oxygen levels. Algae blooms are often caused by excess nutrients, reduce feeding and increase water changes. If you notice a cloudy water, it could be a bacterial bloom, which usually clears on its own. Always have a plan for power outages, a battery-powered air pump can be a lifesaver. And remember, if you’re ever unsure about your fish’s health, ask a local fish store expert or your vet. They can give you specific advice for your situation.
Setting up a saltwater aquarium is a journey, not a race. It’s okay to make mistakes, we all do. The key is to learn, adjust, and keep going. With the right equipment, a little patience, and the love you have for your aquatic pets, you’ll create a beautiful underwater world that brings you joy every day. Happy reefing!